How To: Charcuterie Board
Charcuterie boards have taken the food world by storm, lending an air of sophistication to even a simple food layout. Presentation is everything! The Holiday season is quicky approaching and a handcrafted charcuterie board makes an excellent gift. Yes, you can do this! Read along and we’ll show you how easy a project this can be.
Charcuterie boards have no recommended size, shape or colour; for the purposes of this demonstration, we have chosen a simple oval walnut ‘cookie’ but there are many other options as well. If you are a seasoned woodworker you might decide to carve out a handle from the piece, add some epoxy accents or CNC a logo or text. Even if you consider yourself more a novice than a pro, you could consider adding knobs or handles. Or leave it as is and let the beauty of the wood speak for itself.

Materials Needed
Finishing a charcuterie board is pretty straightforward and won’t require much in the way of materials. You should be able to manage the project with the following:
- Charcuterie board
- Sandpaper – 80 grit, 120 grit, 220 grit
- Maroon Abrasive pad
- Finish (we’ll be using Ligna Bio-supra, a 0-VOC hardwax oil, formulated for use on food-contact surfaces)
- Cotton rags or shop towel
- Scrap wood
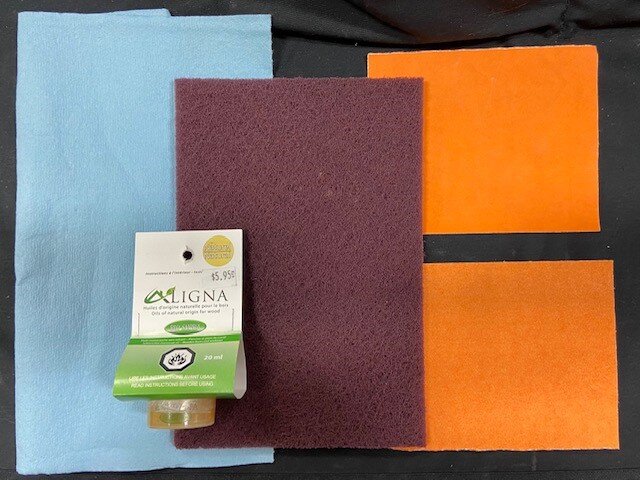
Just a few materials needed…
Sanding
Most cookies or wood slices will need some sanding, even if it has already been planed for you. Our Cookies are lightly sanded, but you will want to do a finish sand prior to adding oil to even out the surface and minimize sand marks.
Start by taking a look at the sanding scratches on the piece. If the scratches are deep, you may want to start sanding with a coarse paper (80 grit) to speed things up. After you’ve removed any large scratches, (if necessary) moving up to 120 grit will begin smoothing the surface. For flat surfaces, using a sanding block or wrapping your paper around a scrap of wood will help to avoid uneven sanding. Always try to work with the direction of the grain – this will minimize visible scratches from sanding. If you’re using a random orbital sander (ROS), you can pay less attention to your working direction.
Remove any sanding dust with a cloth, brush, or vacuum, and sand again at 220 grit. Starting with 220 grit right away can still remove the sanding marks on the pieces but will take longer to get a nice surface than stepping up through grits. Its worth being careful with your sanding, as some scratches can be almost invisible, until you’ve put your finish on.
Remove Dust
After your final sand, remove all sanding dust with a cloth, dust brush or a vacuum. This will ensure that you don’t have any debris getting into your finish and marring your piece. Be sure to remove the dust from the edges as well, especially if you are working with a live edge piece.
Oiling
We are using a food-safe oil called Ligna Bio-Supra for our demonstration due to its 0-VOC content and natural appearance. The oil finish is also repairable and can be refreshed if the charcuterie board takes any damage from being cut on.
Using a maroon abrasive pad, spread the oil around the surface. Best to start on the back so when you flip it to work on the other side there is less worry for you damaging the good side of the board. The abrasive pad is useful for applying the oil, as it helps to refine the wood surface while the oil is laid down. If you don’t have an abrasive pad, don’t worry – a cotton rag or shop towel can work well too. Just be sure to practice safe rag disposal, which we’ll go over in a minute.
Waiting and Buffing (and Waiting Some More)
Wait 5-10 minutes for the oil to soak into the pores before buffing it off. Buff the oil off with a cotton cloth or shop towel until no more oil comes off onto the cloth. A regular paper towel or similar will come apart causing pilling and you can get pieces of debris stuck to your beautiful new piece.
Be sure that no oil comes off onto the cloth before switching to the sides and back. Extra oil on the surface doesn’t add any protection, and it will cure with a ‘gummy’ consistency. If in doubt, buff some more. It won’t do any harm, and the small amount of heat generated from the buffing will actually help the oil set up quickly.
If you’re happy with the finish, your work is done. If you’d like to build the finish a bit more, feel free to apply a second coat of Bio-Supra. If you’re using abrasive pads, switching to a grey pad for your second coat will further refine the surface. If you’re using a rag or shop towel to apply, just repeat what you did for the first coat.
Allow approximately a week for your piece to fully cure prior to using it or giving it as a gift. If you are using Bio-Supra, or a similar oil product, you will notice a distinct “vegetable oil” scent when the finish is fresh. This scent will become less and less noticeable over the next few days as the oil cures with air exposure. Once the scent is gone, your board should be ready for use.
If you are truly in a last-minute bind, just be sure to tell the recipient to wait a few days before using it.
Safe Rag Disposal
Oil finishes are combustible, and the rags or shop towels that you use with them need to be safely disposed of. To ensure your workspace isn’t “LIT” with an explosion/fire, safely dispose of your used rags by wetting them with water, then lay them flat outside for a few days. Please remember that they’re covered in oil, so don’t lay them on unprotected stone or woodwork, as they could leave marks. Once the rags are fully dry, they’re safe to dispose of with household garbage.
Click HERE for a print out to attach to your Charcuterie board detailing wait times and care instructions for gift-giving purposes!
CONGRATULATIONS! In 5 simple steps you now have a hand-made Charcuterie board! Get creative by customizing with different coloured epoxies, inlays and decorative details.
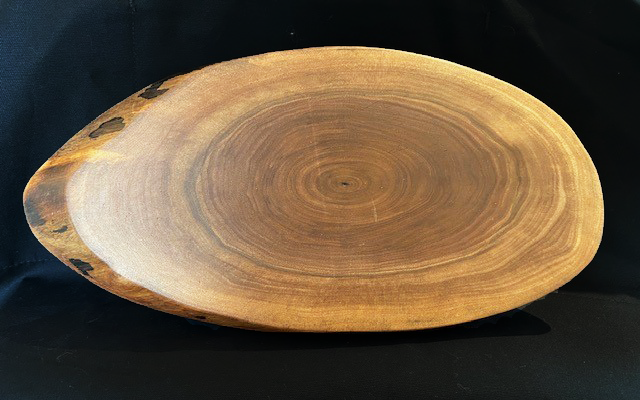
The completed Walnut Charcuterie Board!